Roblox Auto Launcher
The Roblox Auto Launcher automatically manages your Roblox instances across all devices. It launches games, detects crashes, and keeps your accounts running 24/7 with minimal setup.
What It Does
- Detects all your Roblox instances automatically
- Assigns specific games to different usernames
- Launches games automatically when they crash or stop
- Monitors if accounts are actually playing (not just logged in)
- Reboots devices when they become unresponsive
Quick Setup
Step 1: Access the Launcher
- Open Zerx and select “Roblox Auto Launcher”
- Wait for scanning - Zerx detects all devices and Roblox instances
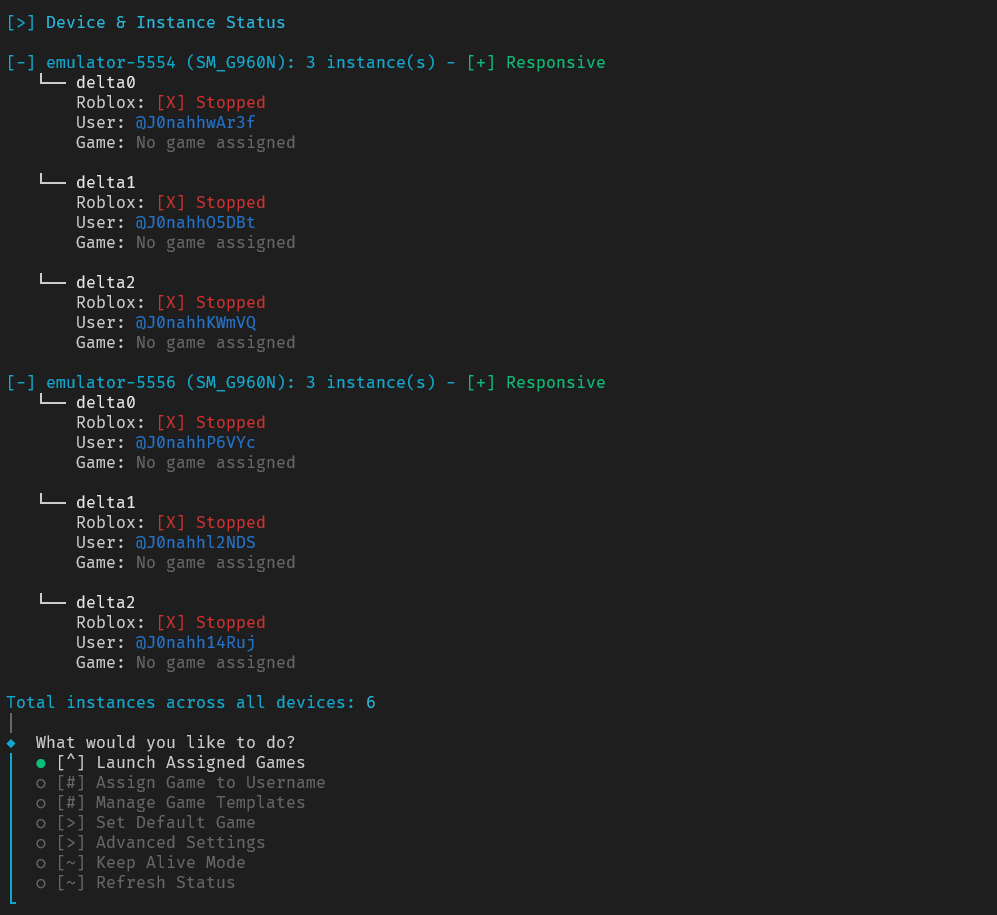
You’ll see all your devices, which accounts are logged in, and their current status.
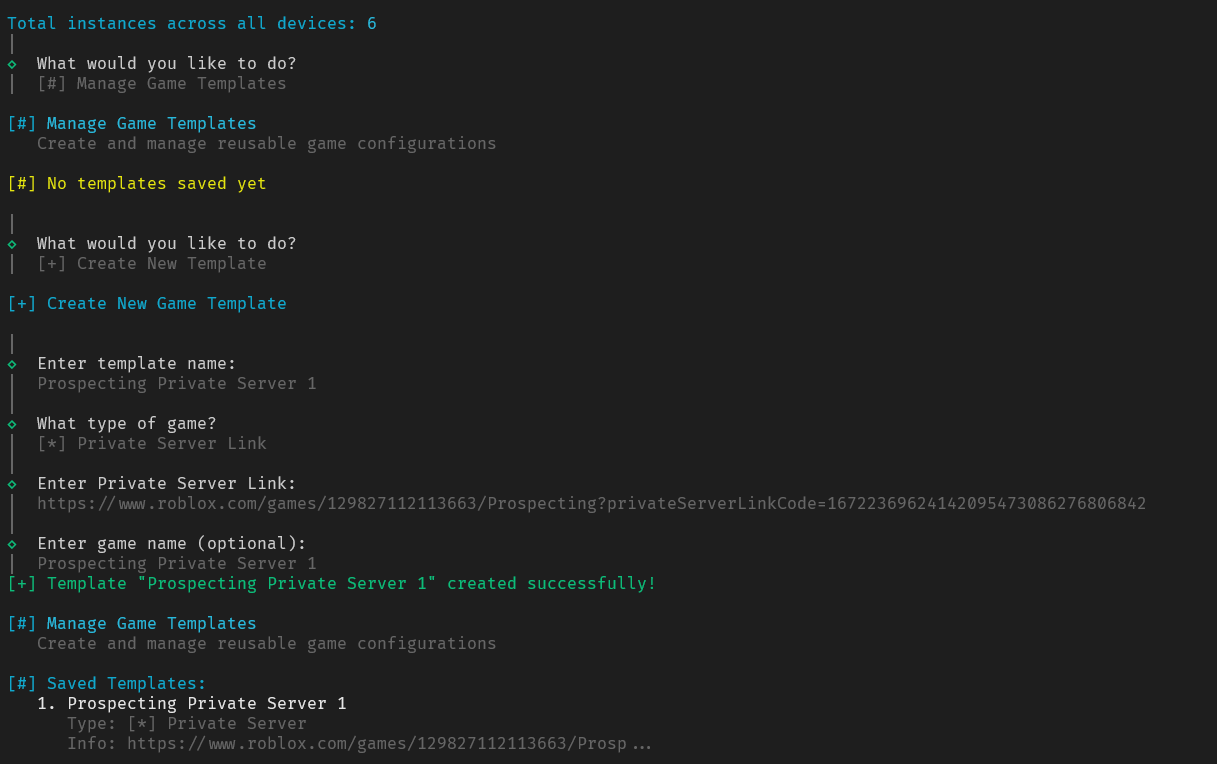
Step 2: Create Game Templates (Optional)
Templates make assigning games faster if you use the same games repeatedly.
- Select “Manage Game Templates”
- Choose “Create New Template”
- Pick game type:
- Game ID: For public games (e.g., Pet Simulator 99)
- Private Server: For private server links
Step 3: Assign Games to Users
- Select “Assign Game to Username”
- Choose a username from your logged-in accounts
- Pick how to assign:
- Use Template: Select from saved templates
- Game ID: Enter game ID directly
- Private Server: Enter private server link
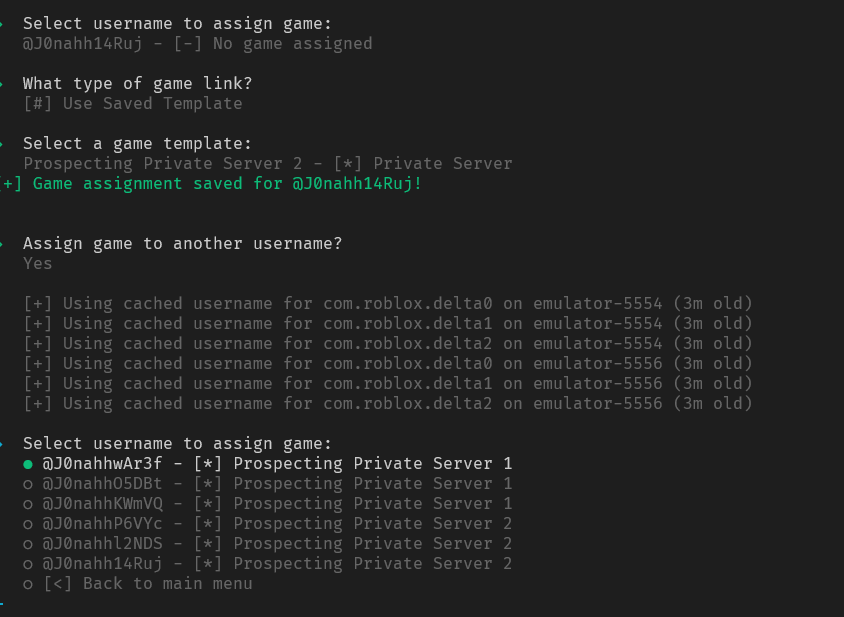
Repeat for each account you want to manage. In this example I assigned 3 accounts to one private server and the last 3 on another private server. Using the saved templates I made.
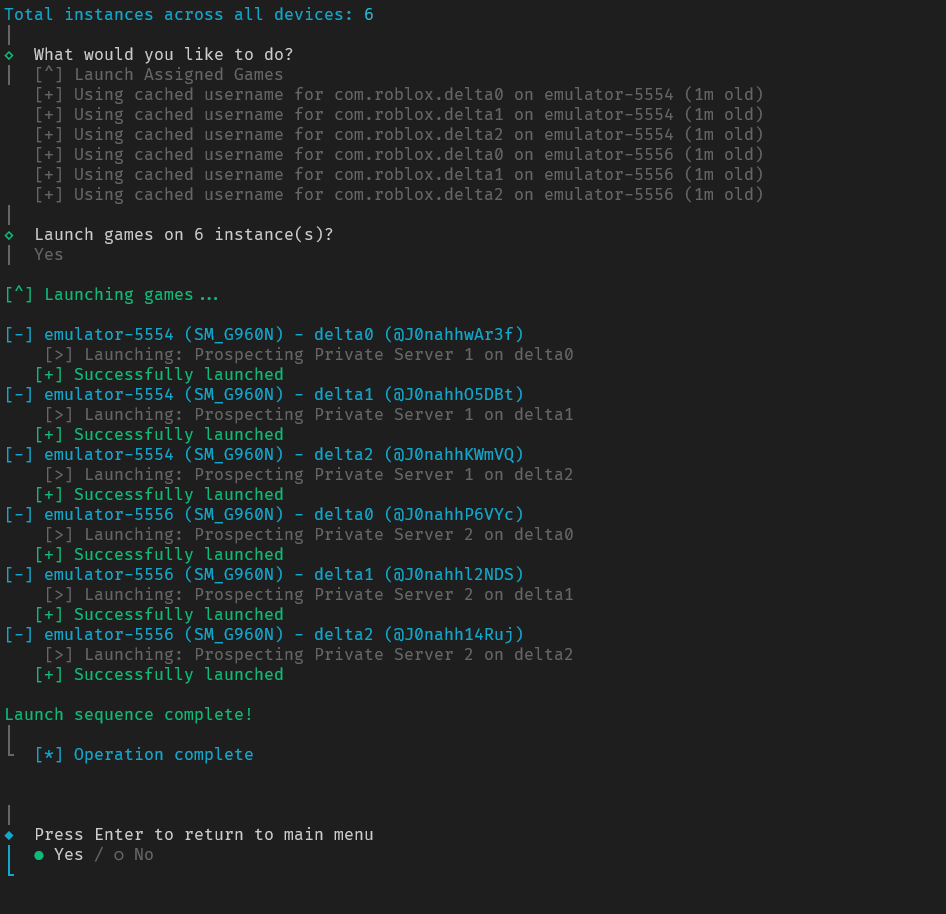
Step 4: Launch Games
- Select “Launch Assigned Games”
- Confirm to start launching
- Games will launch on all assigned accounts
Keep Alive Mode (24/7 Farming)
This is the main feature for automated farming.
Setup Keep Alive
- Select “Keep Alive Mode”
- Configure settings:
- Check Interval: How often to check (recommended: 60 seconds)
- Auto-Reboot: Restart devices every 3 hours (recommended: Yes)
- Presence Checking: Verify accounts are actually playing (recommended: Yes)
What Keep Alive Does
Every Check Interval:
- Scans all instances for crashes
- Relaunches crashed games automatically
- Checks if accounts are actually playing (not just idle)
- Reboots unresponsive devices
Auto-Reboot (Every 3 Hours):
- Restarts all LDPlayer instances to prevent memory issues
- Automatically relaunches all games after reboot
- Keeps everything running smoothly long-term
Important Settings
Set Default Game
If you want all accounts to play the same game (instead of individual assignments):
- Select “Set Default Game”
- Enter game details (Game ID or Private Server)
- All unassigned accounts will use this game
Advanced Settings
Device Timeout: How long to wait for device response (default: 15 seconds) Presence Check Interval: How often to verify accounts are playing (default: 5 minutes)
Best Practices
Initial Setup
- Start with 2-3 accounts to test everything works
- Use Game Templates for games you’ll reuse
- Test manual launches before enabling Keep Alive
Keep Alive Configuration
- 60-second check interval works well for most setups
- Enable auto-reboot every 3 hours to prevent issues
- Enable presence checking for reliability
Troubleshooting
Games Won’t Launch:
- Check that accounts are logged into Roblox instances
- Verify game IDs are correct
- Make sure private server links are still valid
Keep Alive Not Working:
- Ensure devices are responsive in the status screen
- Check that Roblox instances aren’t crashing due to device overload
- Verify internet connection is stable
Accounts Not Detected:
- Make sure accounts are actually logged into the Roblox apps
- Try refreshing the status screen
- Restart Zerx if needed
Scaling Up
Once comfortable with the basics:
- Add more devices following the device setup guides
- Clone more instances using VM cloning
Need Help?
Join our Discord community for:
- Setup help and troubleshooting
- Game-specific configuration tips