Setting Up LDPlayer for Zerx
This guide shows you how to configure LDPlayer to work optimally with Zerx. The setup process depends on which version of LDPlayer you installed from the Installation Guide.
Video Tutorial
I’m very aware people like to watch videos instead of reading (I’m the same)
Youtube Video - https://www.youtube.com/watch?v=dDZ-2M2Sly8
Setup Instructions by Version
✅ If you’re using LDPlayer 9.0.30 Lite (Optimized):
Good news! Simplified setup process.
- Use the default instance - No need to create a new one
- Configure basic settings (see Step 4 below)
- Skip app disabling - Unnecessary apps are already optimized
❌ If you’re using Official LDPlayer:
Full configuration required - Follow all steps below.
Configuration Steps
Step 1: Open LDMultiPlayer
- Press Windows key
- Search for “LdMultiPlayer” and open it
- You’ll see the LDPlayer management interface
Step 2: Instance Setup
For Optimized Version:
- Keep the default instance - It’s already properly configured
For Official Version:
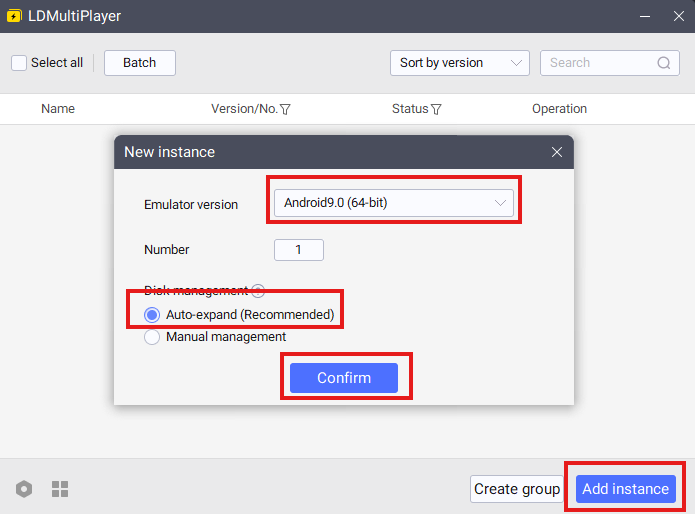
- Delete the default instance - Right-click and remove it
- Click “New” to create a new instance
- Choose Android 9.0 64-bit - This version works best with Zerx
- Set Disk Management to “Auto-expand” - This prevents storage issues
Step 3: Basic Settings
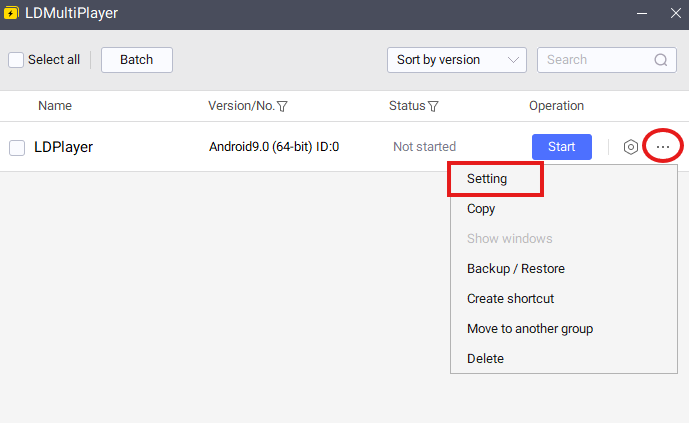
- Right-click your instance and select “Settings”
- Set Resolution - Choose any resolution for now (you can optimize this later)
- Set CPU and RAM - Use default settings for now (optimization comes later)
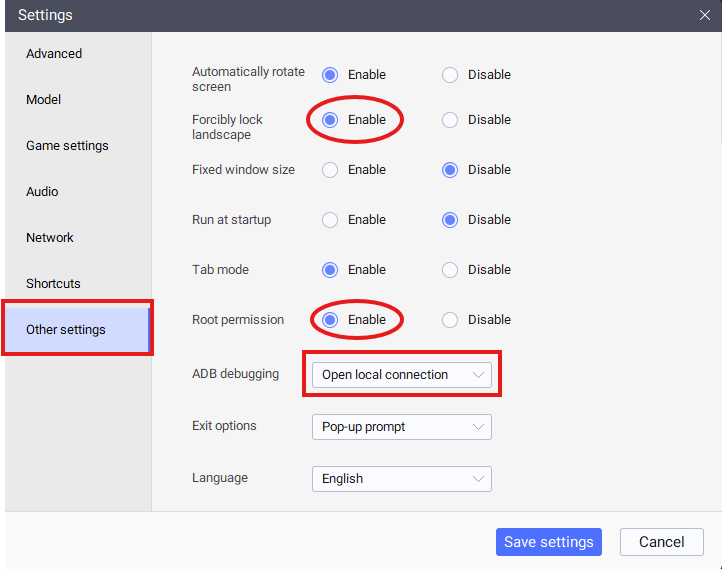
Step 4: Enable Required Features (Both Versions)
⚠️ Required for both optimized and official versions
Go to the “Other Settings” tab and enable:
- ✅ Forcibly lock landscape - Keeps screen orientation consistent
- ✅ Allow root permission - Required for Zerx functionality
- ✅ ADB debugging - Set to “Open local connection”
Step 5: Save and Test
- Click “Save Settings”
- Start the instance to make sure it boots properly
- Wait for Android to fully load
Disable Unnecessary Apps
⚠️ Skip this section if you’re using the optimized version
For Official LDPlayer only - these apps can interfere with Roblox performance.
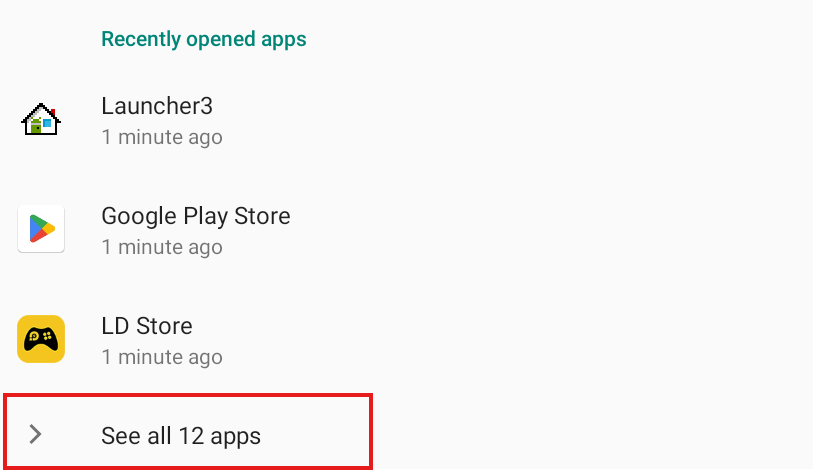
Step 6: Open Android Settings
- Open Settings in your Android instance
- Go to “Apps and Notifications”
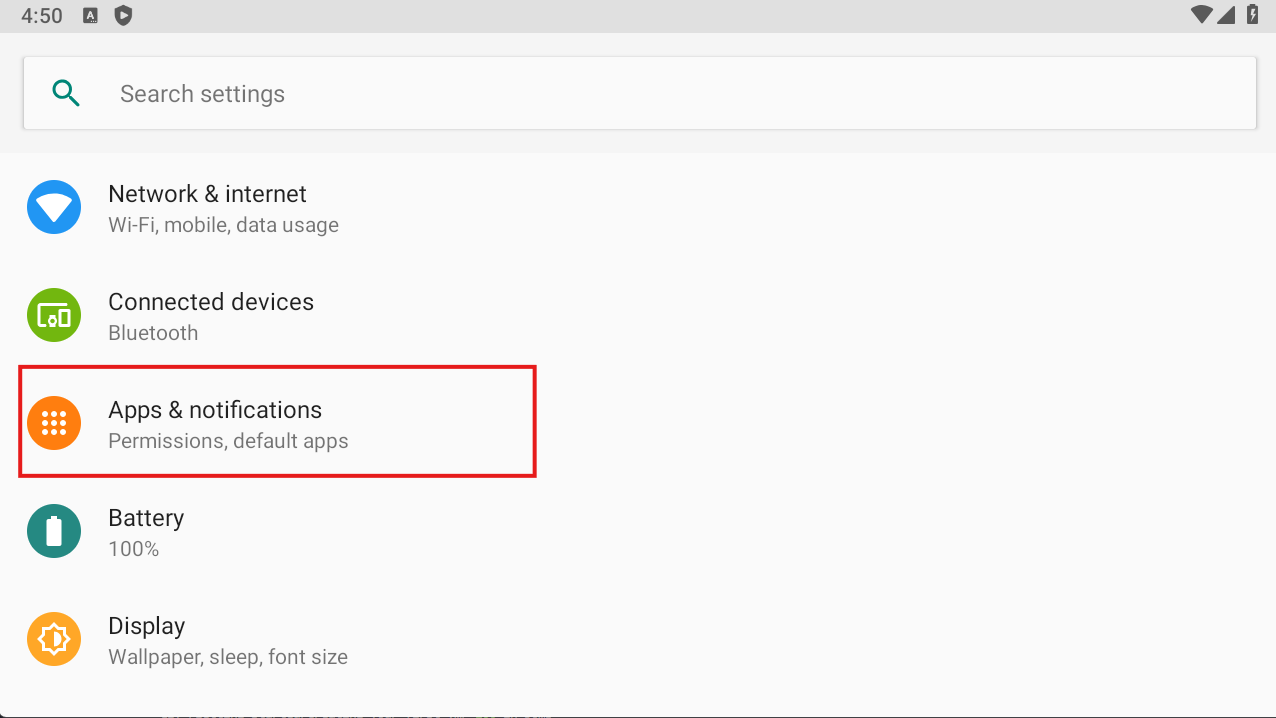
- Click “See all 12 apps”
Step 7: Disable Services
Disable these apps one by one:
- Google Play Games - Find it and click “Disable”
- Google Play Store - Find it and click “Disable”
- LDStore - Find it and click “Disable”
You’re Ready!
Your LDPlayer instance is now configured for Zerx.
Setup Summary
| LDPlayer Version | Instance Setup | Settings Required | App Disabling | Total Time |
|---|---|---|---|---|
| Optimized 9.0.30 Lite | Use default | ✅ Root/ADB/Landscape | ❌ Skip | ~1 minute |
| Official LDPlayer | Create new | ✅ Root/ADB/Landscape | ✅ Required | ~2-3 minutes |
Why the Optimized Version is Better
- Faster setup - No need to create new instances or disable apps
- Better performance - Up to 40% lower CPU usage
- Pre-optimized - Unnecessary services already handled
- Same functionality - Still need basic settings, but streamlined process
Next Steps
- Installing Roblox - Install Roblox clients on your instance
Need Help?
Join our Discord community for support and tips from other users.
⚠️ Important Note: Regardless of which version you use, make sure ADB debugging and root access are enabled - Zerx needs these to communicate with your instances.