Cloning Your First VM
Once you’ve set up your LDPlayer instance and installed Roblox, you’re ready to create android clones.
Video Tutorial
I’m very aware people like to watch videos instead of reading (I’m the same)
Youtube Video - https://www.youtube.com/watch?v=FfdaA5YsqWg
Why Clone Your VM?
Key Benefits
- ✅ Identical Hardware IDs - All clones share the same system fingerprint
- ✅ Executor Key Compatibility - Key systems tied to hardware work across all devices
- ✅ Pre-logged Accounts - Accounts stay logged in after cloning
- ✅ Time Saving - Set up once, clone many times
⚠️ Tip: Get Your Executor Key First!
Before cloning, make sure to:
- Get your executor key and activate it on your main instance
- Log into all your Roblox accounts on the floating clones
- Test that everything works properly
- Setup script configuration a lot of farming scripts require you to setup a config. If you set it up on your first device, the configuration can be brought over to the new devices
This saves you from having to set up keys and login to accounts on every single clone!
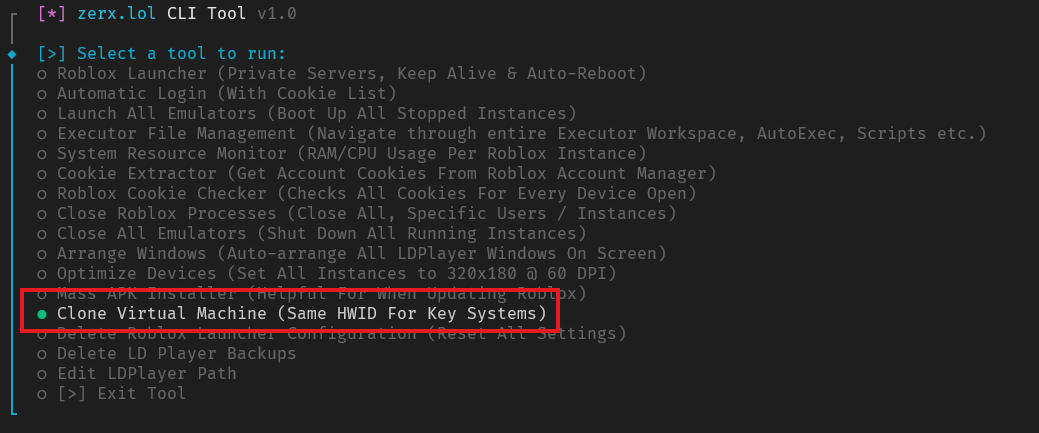
Using Zerx Clone Feature
Zerx includes a built-in VM cloning tool that makes this process simple and automated.
Step 1: Access Clone Feature
- Open Zerx
- Navigate to the Clone Virtual Machine (Same HWID For Key Systems) option
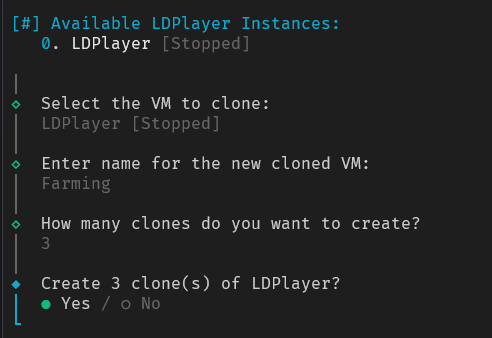
Step 2: Select Source Instance
- Choose your configured instance - This should be your fully set up VM with:
- Roblox clients installed
- Executor keys activated
- Accounts logged in
- All settings configured

Step 3: Configure Clone Settings
- Enter clone name - Choose a descriptive name like “FarmBot-Clone”
- Set number of clones - Start with 2-3 for testing
- Review settings before proceeding
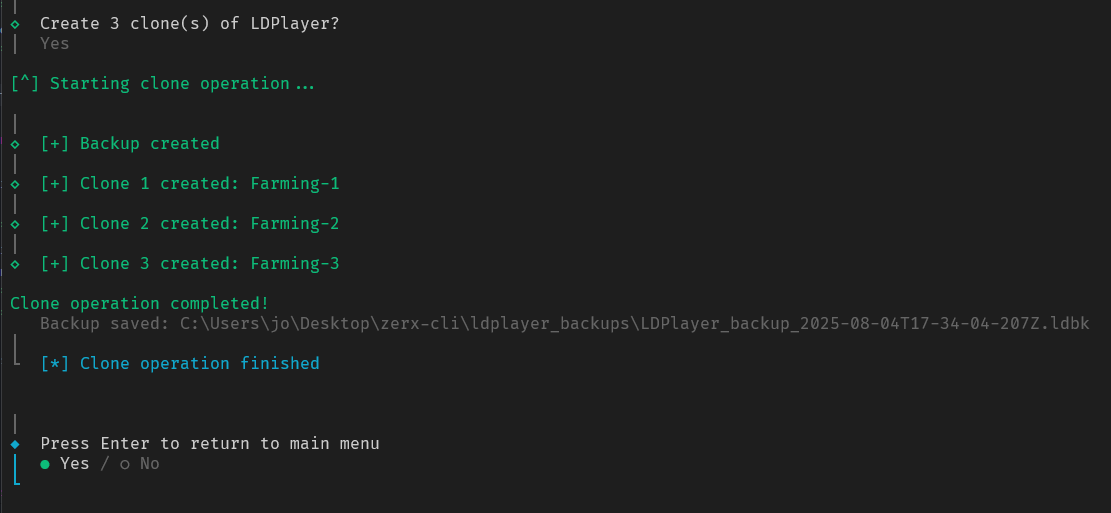
Step 4: Start Cloning Process
The cloning process will:
- Create a backup of your source instance
- Stop the source instance temporarily
- Create new instances with identical configurations
- Restore settings to each clone
- Rename instances appropriately
What Gets Cloned?
Preserved Elements
- Hardware fingerprint - Same device ID across all clones
- Executor installations - All your exploit clients ready to go
- Account login data - Roblox accounts stay logged in
What You’ll Need to Do
- Launch clones - Start each instance manually first time
- Test functionality - Verify everything works as expected
- Use automatic login - Switch between accounts
Using the Cookie Checker to see if it can detect the accounts
- Launch all emulators using this option on the tool. “Launch All Emulators (Boot Up All Stopped Instances)”
- Wait for all the emulators to be fully loaded
- Run the Roblox Cookie Checker
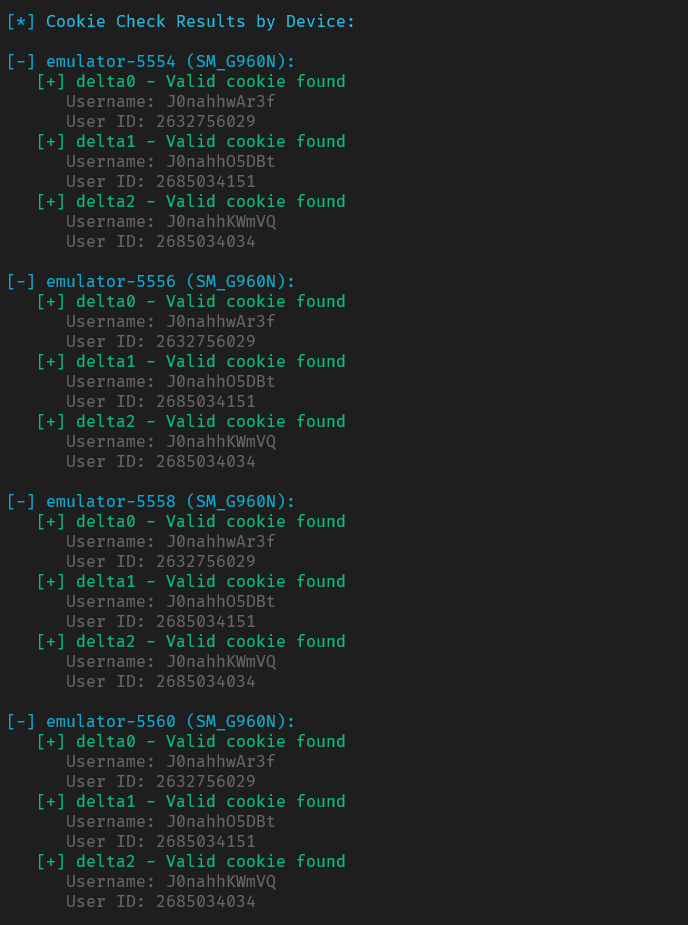
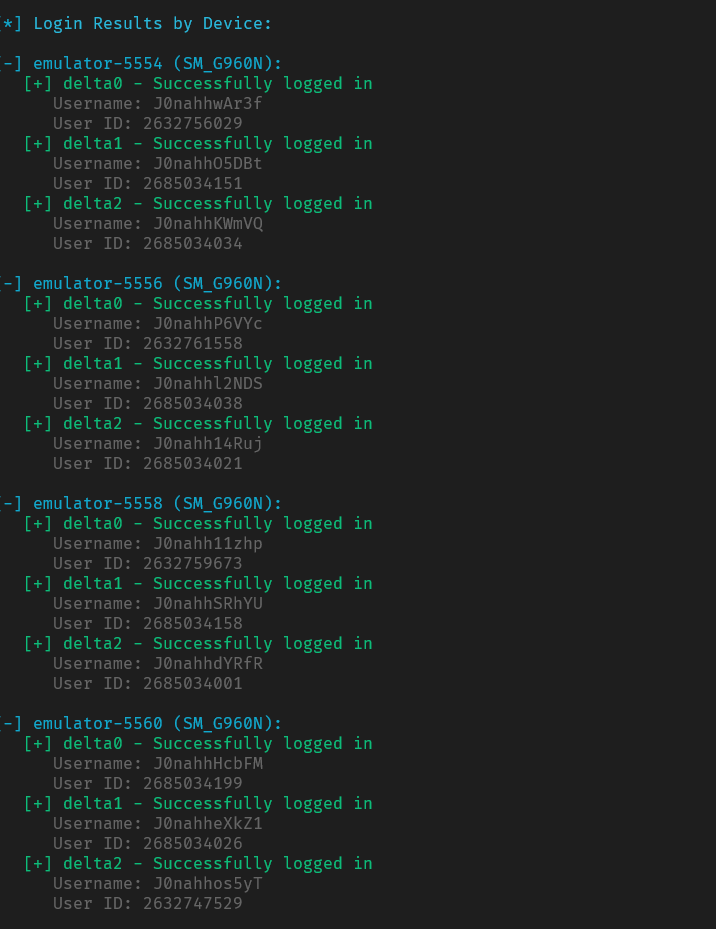
As you can see each instance is logged into the same accounts. You can then use the automatic login feature to switch the accounts.
Login Results After Automatic Login With Cookie List
Troubleshooting
Common Issues
Clones won’t start:
- Check if source instance is fully stopped
- Verify enough system resources available
- Restart LDPlayer completely
Executor keys not working:
- Make sure you activated keys on source instance before cloning
- Some key systems may require re-activation (rare)
Accounts not logged in:
- Verify accounts were logged in on source before cloning
- Use Zerx’s automatic login to switch cookies
Next Steps
After successfully cloning your VMs:
- Device Optimization - Changing emulator specifications for the best performance
Need Help?
Join our Discord community for support with cloning and multi-boxing setups!